Monday, 13 January 2014

Nail Art Trend

"Be a nail art star"

Oh! how we all love beautiful nails. Nail art is trending of course and so I'm here with my new post on nail art...
Nowadays fingernails and toenails are seen as important points of beauty. Its a fashion activity relating to manicuring.
Nail polish has a long history. In china it started off being made from a combination of beeswax, egg whites and other similar stuffs, fortunately we don't have to deal with such thing and can get a good quality nail polish from any cosmetics store.

As a matter of fact I myself never ever applied nail paint!! Yes im 23 and i never did that but i love to paint my BFFs nails. I have some sort of nail paint phobia i guess!
Anyways i bring to you some best and easy nail arts out there.. I found them over the internet and thought of sharing with my lovely readers. Im dont author these nail arts.

Hope you like them :)

1) The simplest nail art design:
Its simple and easy and quick. Give it a try girls.


2) Lovely Hearts
Wont you try it for the valentine ;)


3) Fishnet Nail art
Looking complicated but you can see how easy it is!


4) Pastel Faded nails
Pink is Style

5) The kitty love
This one is for the cat lovers


6) Butterflies
Be the beauty you are.


7) City life nails
This one is so so artistic.


8) Gold leaf nail art
So Chic. Isnt it. I loved this most.

9) The cheetah print nails.
Gotta have a bit of practice for this.


10) The Blue Marble
So stylish and easy, Stun you friends with this gorgeous art.


~~~~~~~~~~~~~~~~~~~~~~~~~~~~~~~~~~

"Some Tips And Tricks"

To achieve such precision in this art we have to have some tips and tricks and im sharing some with you :

1) Make your own dotting tool. This is a must have thing.


2) Learn proper way of applying nail polish.


3) How would you fix a broken nail.
I think with a tea bag and a nail glue.


~~~~~~~~~~~~~~~~~~~~~~~~~~~~~~~~~~

"Keep in mind"

That you got to whiten your nails after removing your dark nail polish.
That mistakes can be removed by dipping a tiny brush in the nail polish remover.
That its always better to apply thin coats instead of one thick coat.
That you can protect your skin from errant nail polish strokes by applying vaseline to the cuticles.
That nail polish thinner Not nail polish remover is used to revive thick, goopy bottles of nail polish.
That a smudge can be fixed by licking it.
That you can use vapoRub to cure infected nails.
That if air is humid, wait extra long for your nails to dry.


Friday, 3 January 2014

The Valentine Heart

Hello Folks, This is my first post for year 2014 and this year i promise to update my blog more frequently :)
So todays post is about Love!!

"I have decided to stick with love. Hate is too great a burden to bear." 

Martin Luther King Jr

Thats what i decided as well! Love to me is like breathing, it's always with you. Well, we can go on and on in describing love and yet it will be undone!
In todays post i'm going to show you the Valentine heart that i have made, its easy of course! the steps are same as goes in the making of the Lovely Heart cushions but as is evident-the sizes differ. valentine heart is smaller in size and has a string attached to it so that it can be hanged as a wall decor.


Decorate it,, Write a message on it ,, Gift it to someone. You can do anything.  
I clicked away some of its pictures, although the picture quality is not as good its okay!


 Thankyou for visiting my blog. I love my lovely readers :)
Love and be loved.


Sunday, 29 December 2013

Heart Cushions

This is the tutorial to show you how you can make your own Heart Cushions.


Materials:
Velvety fabric(Half meter for 1 cushion) :Being velvety adds luster and soft touch to the Cushion. I choose Chocolate and cream colors.
Satin Ribbon(1.5 mtrs for 1 cushion) : I choose same colors as the fabric.
Rhinestones.
Fabric Glue.
Scissors.
Measuring tape.
Soft Cushion stuffing.
Tapestry needle.
Thread.
And a bit of patience. 

How To:
Now let us see how to make these lovely cushions.

Step 1: 
First of all fold the fabric in the middle.
Now make an outline of heart shape over it probably with a chalk. The measurements can be seen in the picture below. Don't cut the fabric over the chalk outline but after almost leaving half inch more. The outline will be used to stitch over and extra fabric will come inside! 


step 2:
With this done you will have two sides of the heart.
pick one of the sides and start outlining it with the ribbon.
Ribbon is attached from the right side.
You can either Fold ribbon or use it full.
Near the curves fold ribbon a bit and continue to stitch.(ref pic below)
I know this part is a bit tricky.


Step 3:
Place this on other side of the heart with both right faces of fabric facing each other and wrong faces outwards and stitch them together.
You can take the first stitch(to join the ribbon) as the guide for your second stitch(joining the sides).
Leave a space or opening of about 10-15 cms to turn it inside out.


Step 4:
Turn it inside out and start stuffing it.
You will see the heart shape becoming prominent.
When you are done with stuffings close the opening with the help of your tapestry needle and thread.
Small stitches are recommended so that they wont show.


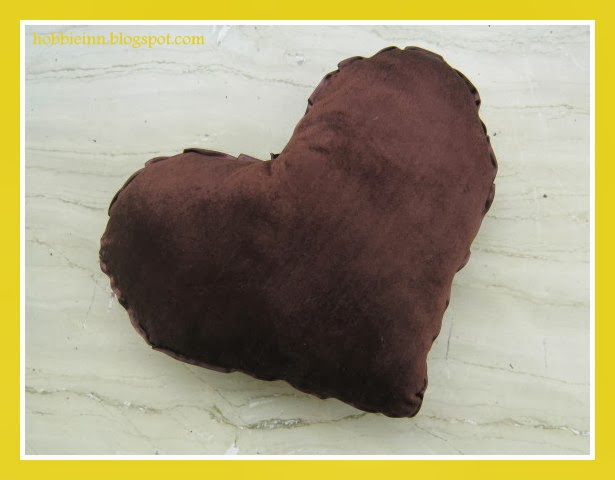
when done you will have a cushion like this:


Step 5:
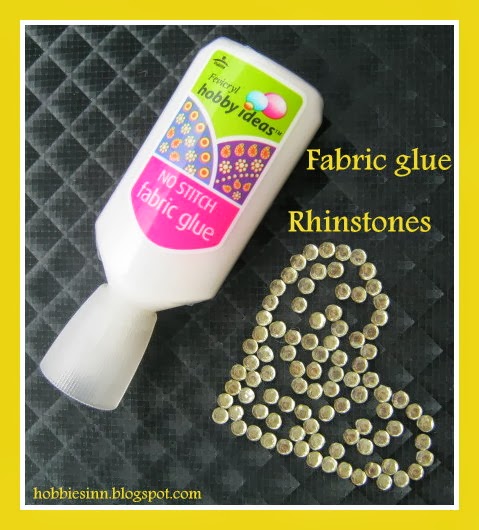
You are almost done. Now it is time to paste some rhinestones over it.


Fabric glue is fabric friendly adhesive used to paste any sort of applique to the fabric.
It is must have tool in your fabric crafts.
How to use this glue: Put a thin layer of fabric glue over the applique and then put the applique over the fabric.
Press for 10 seconds and then release.
Wait for 24 hrs before you actually use your fabric.
So I kept ,y cushions for 24 hr before i used them in my bedroom to complement my chocolate and cream color bedding!
They look phenomenal. 

_______________________________________________________________________

Thankyou for stopping by.
 :)