Sunday 29 December 2013

Heart Cushions

This is the tutorial to show you how you can make your own Heart Cushions.


Materials:
Velvety fabric(Half meter for 1 cushion) :Being velvety adds luster and soft touch to the Cushion. I choose Chocolate and cream colors.
Satin Ribbon(1.5 mtrs for 1 cushion) : I choose same colors as the fabric.
Rhinestones.
Fabric Glue.
Scissors.
Measuring tape.
Soft Cushion stuffing.
Tapestry needle.
Thread.
And a bit of patience. 

How To:
Now let us see how to make these lovely cushions.

Step 1: 
First of all fold the fabric in the middle.
Now make an outline of heart shape over it probably with a chalk. The measurements can be seen in the picture below. Don't cut the fabric over the chalk outline but after almost leaving half inch more. The outline will be used to stitch over and extra fabric will come inside! 


step 2:
With this done you will have two sides of the heart.
pick one of the sides and start outlining it with the ribbon.
Ribbon is attached from the right side.
You can either Fold ribbon or use it full.
Near the curves fold ribbon a bit and continue to stitch.(ref pic below)
I know this part is a bit tricky.


Step 3:
Place this on other side of the heart with both right faces of fabric facing each other and wrong faces outwards and stitch them together.
You can take the first stitch(to join the ribbon) as the guide for your second stitch(joining the sides).
Leave a space or opening of about 10-15 cms to turn it inside out.


Step 4:
Turn it inside out and start stuffing it.
You will see the heart shape becoming prominent.
When you are done with stuffings close the opening with the help of your tapestry needle and thread.
Small stitches are recommended so that they wont show.


when done you will have a cushion like this:
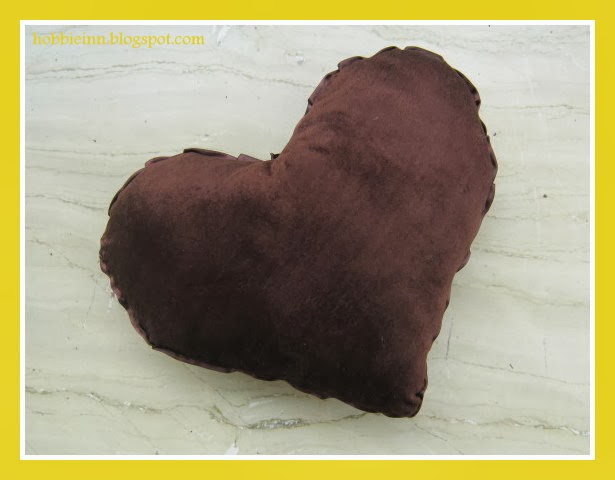


Step 5:
You are almost done. Now it is time to paste some rhinestones over it.


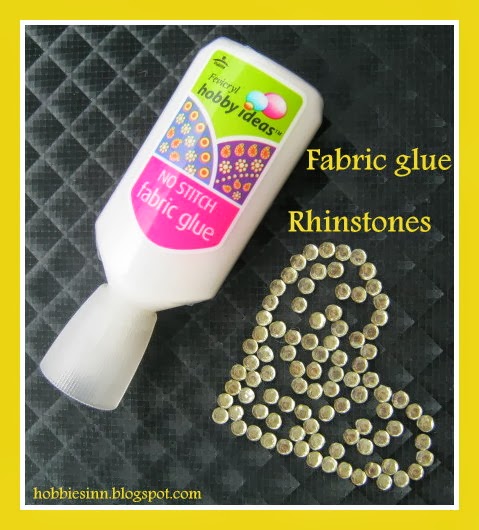
Fabric glue is fabric friendly adhesive used to paste any sort of applique to the fabric.
It is must have tool in your fabric crafts.
How to use this glue: Put a thin layer of fabric glue over the applique and then put the applique over the fabric.
Press for 10 seconds and then release.
Wait for 24 hrs before you actually use your fabric.
So I kept ,y cushions for 24 hr before i used them in my bedroom to complement my chocolate and cream color bedding!
They look phenomenal. 

_______________________________________________________________________

Thankyou for stopping by.
 :)


Friday 27 December 2013

Mini Crochet Heart Tutorial

Hey! In this post i'm going to show you how to make mini crochet hearts. They are easy to make.
They are really very quick to make and for a beginner in crocheting you will love making them.
This is how they look like.


I think i can really use them in numerous projects, some of my ideas are ear rings , cake toppers , garlands and the list can go on.

Ok now choose your favourite color yarn and crochet hook.

Step 1:  Starting from the slip knot make a chain of 4 stitches.

Step 2:  Now build a single stitch row on this chain. Repeat this two more times so that you have a tiny little square, as in the picture.

Step 3:  Chain 2 and then locate the center of one edge of the square and double crochet in the same place 4 times , you will have a semicircular bump on that side and that forms one side of the heart. ref pic.

Step 4: Join it with the corresponding vertex of the square. Starting from this vertex now make a new semicircle over the next edge of the square and join it with the third vertex.

Step 5: Look You are done!


Happy crocheting :)

Wednesday 25 December 2013

Card Making

One can simply go to some gift shop and buy a greeting card but handmade cards are so fun to make and mean so much more. If you find yourself indulged in card making just know that either you love making cards or you really love people around you or in other case both just like me. J J

Card making is fun, easy and a great way of expressing your creativity. You only need few craft supplies, some cool ideas and some paper craft tools. You don’t need to be an advanced crafty person to make cards; anyone can do that.

You can make unique handcrafted cards for a wide range of occasions including Birthday, Christmas, Easter, Mother’s Day, Father’s Day, Valentine’s Day, Wedding, Anniversary, New Baby, Christening, New home, Get well, Bon voyage, Congratulations, Good luck…Yeah the list is endless.

Now talking about the card designs cards can be simple or complicated as you may want. You don’t need to have lots of money or time you can create master pieces out of gift wraps, scrap books, memory albums, ribbons and laces or whatever you can think of!
Often the most effective designs can be created in less than half an hour, with just a few basic components.

The basic material you may use is the paper and additionally you may want card toppers, stickers, embellishments, pens, markers, colors, glitters, glue, scissors, ruler, tape etc
You can surf through Google for ideas if you don’t have any!
So grab up your things and get started. Don’t worry if it is not what you wanted just remember everything that is made with love is beautiful J Moreover practice makes you perfect. Don’t stop until you get it right.


I happened to make a greeting card for a friend. I used glitter colors and a real flower. It added a touch of realism to a card. This flower was left as such for few days so that it let all the moisture. Make sure your flowers have lost all their moisture before using them in a project or they may turn brown. To attach the flowers use dry adhesive dots.

The First Snowfall Of Winter...

A joyous Day with absolutely nothing to do !


"The first fall of snow is not only an event, it is a magical event. You go to bed in one kind of a world and wake up in another quite different, and if this is not enchantment then where is it to be found?"

J. B. Priestley 


J.B Priestley quoted it well. Snowfall is a magical event and the magic of first snowfall is indescribable!
Nothing could have complimented the day more than a hot coffee, warm cozy indoors and time with my family :)
There was something special about the day; why? i dont know!
 We had our breakfast in our cozy little kitchen and till noon nobody seemed to like to go out. All throughout the day whole family was together and the chit chat was lovely. It was like the home Picnic-Togetherness and Delicious food with the beauty showering all over!
The white outside gave the feeling of Peace, Harmony and Sense of being Loved.
Well the day would have been incomplete without the snowball fight :D and really that was the fun part.

A view from my room :)
    
The delight of winter, the freshness of spring, the sweetness of summer and the musky fall we simply cherish them all but a winter is not winter if there is no Snow!

Friday 20 December 2013

10 Minute Multipurpose Bows

OK!! I really did take too long to post this tutorial...

Although I'm a bit late, I'm here with my cute bow to show. 10 min's are more than enough for this project.
I call these bows Multi-purpose because of their many uses. You can use them in Hair clips, Headbands, Brooches, Bags and Whatever you can think of. I used mine to make a cute headband.


Materials:


I used Cotton Fabric and
Few centimeters of Satin ribbon (~ 1 cm wide).
I choose red color.

How To:


Cut a square piece from the fabric you want to use.
My bow had measurements = 14.6 x 13.5cms. while choosing the appropriate measurement (you know sizes of bows vary, you may not want too large bow or too small either) keep in mind the width of of your final product! 

The length of the bow is directly proportional to its width( I'm talking about the final product here) and the length is greater than the width!

This is a nice measurement for medium sized bow.


Fold the Fabric and stitch as shown in the pic. I kept an opening at the center the use of which will be evident shortly.
I marked the stitched area in the pic for better understanding.  


Flatten The fabric and bring the Stitch in the middle and stitch the edges.
Now pull through the the hole you left in the first stitch.
As can be seen th the picture.
Pull nicely and let the corners show.


Twist up with your fingers in the middle and tie with a ribbon.
Ta-Da your bow is ready.

Instead of ribbon you can use a strip of same fabric. 

:) I used the same pattern bow to decorate my Cute Gather Round Clutch


Friday 6 December 2013

Cute Gather Round Clutch

A gather round basket, i found one for the first time on some Japanese website few months ago. At first i didn't knew what it was called or how it is made and that website was not of much help either...
I started searching it with all possible names i could think of until i finally came to know what it is called and found a very nice tutorial from mother daughter duo of A spoonful of sugar
Their Gather round basket tutorial is quiet illustrative and really it is much more easier to make than i had thought, moreover it took me a bit more than half an hour to get it all done !


Well i added a bit of my own creativity to it and converted it from a gather round basket to a gather round clutch! The creativity i added is just a Simple Bow and a zipper.

I didn't use cotton but a thicker velvety fabric.
My gather round basket had 9 inches diameter.

When my basket was done i folded the basket and attached a zipper to it and for decorations i did a simple bow, as in the picture :


The Zipper and the bow is attached with simple hand stitch and not on sewing machine!


It looks cute and gorgeous and is spacious too!
I enjoyed this project and so will you.
So grab up your cutest material and start sewing your perfect little gather round clutch.

I will be sharing a tutorial on how to make a bow in my upcoming post so stay tuned for more. :)